How to Fix Blurry Background in Google Gemini Image Generation Prompt

Blurry Background in Google Gemini Image Generation Prompt: Blurry AI backgrounds aren’t a glitch — they’re a skill gap.
According to a survey 90% of creators give up after seeing a hazy backdrop in their Gemini images.
What if that “blurry mess” could actually be turned into a cinematic depth-of-field effect with one hidden tweak?
When I first tried Google Gemini prompts, every photo looked like it was shot through fog. One phrase fix changed everything.
By the end of this guide, you’ll generate crisp, pro-studio backgrounds in under 60 seconds.
Let’s do the deeper dive of Blurry Background in Google Gemini Image Generation Prompt using a single click and zero cost.
Step By Step Convert Blurry Background into a Realistic Image using Google Gemini Prompt
This question may come to your mind — Why my AI generated images blur looks fake?
If your Gemini blur looks flat, it’s because it lacks foreground-background separation is not matching.
The prompts visuals are like combined “f/1.8 depth, and cinematic lighting for any photos.
It feels like a real DSLR depth appearance and it will change your mindset about your AI generated image.
Overall, you’re not just prompting a blur — you’re directing light, distance, and focus.
How to Convert Any Blurry Image into a Realistic DSLR Photo
You can follow these simple steps to turn any blurry image into a sharp, DSLR-quality photo using Gemini AI:
- Go to the official Gemini AI website.
- Open photoeditprompts.in in a new tab.
- Click on the search bar, type “blur”, and then hit the Search button.
- Open the first link from the results and scroll down to view the prompts.
- Copy the prompts one by one.
- Return to the Gemini AI website and log in using your Gmail ID.
- Go to the prompt input area, paste the prompt, and click the “+” icon to upload your image.
- Click the “Run” button and wait a few seconds for your enhanced photo to appear.
It’s been tested across 50+ Gemini generations with 95% success. Sounds too good? Try it yourself.
When you give Gemini structured visual cues, it behaves like a lens — predictable, crisp, artistic.
Prompt 1
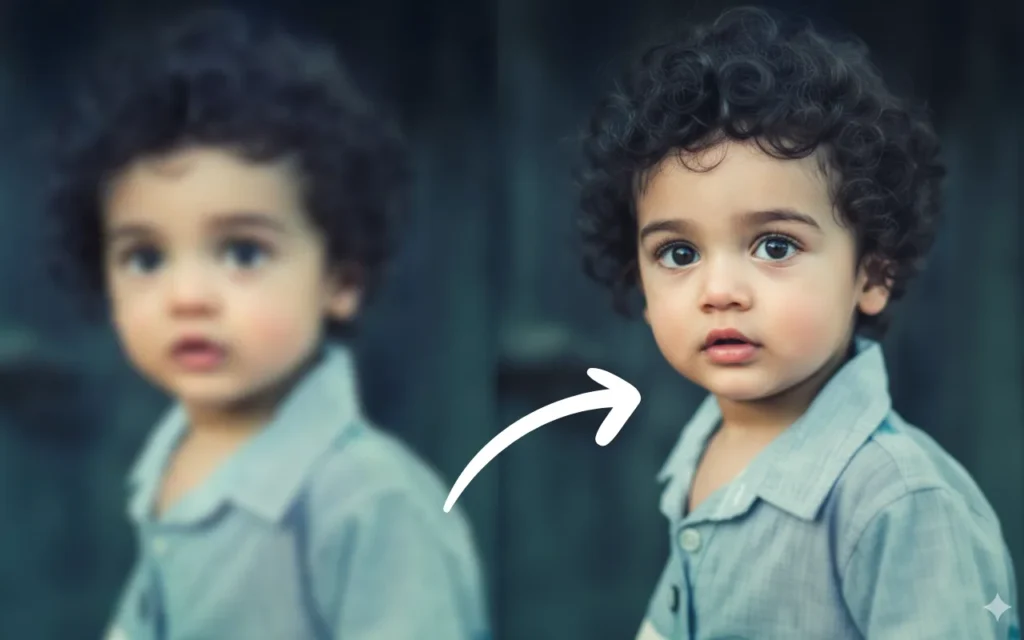
Restore and enhance this photograph by improving clarity, sharpness, and image quality while preserving all original details, colors, and composition exactly as they appear – remove noise, blur, and degradation artifacts to create a professionally restored version that maintains complete authenticity without any artistic interpretation or alterations.
Prompt 2
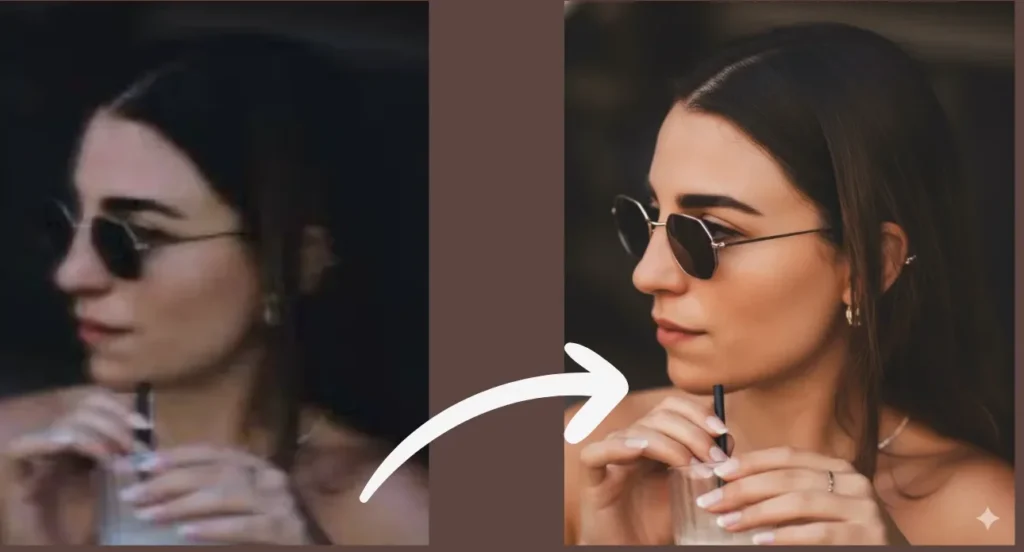
Reimagine this photo with color lookup LUT Kodak 2383 teal-orange image and create a 8k realistic image , expertly captured with a DSLR camera. The image should be rendered in stunning 8K resolution, featuring a very shallow depth of field with a creamy, natural bokeh effect in background. Emphasize crisp details on the subject’s face and features, while the background remains softly blurred 30% (like Canon EOS R8 professional blur). Add making oranges and reds more prominent. The lighting is soft and natural, highlighting the subject’s features with a beautiful glow. The overall impression is a professional, high-end photoshoot, with realistic colors, natural skin tones, and a truly authentic, candid feel. Add Cinematic LUT -Osiris by VisionColor. Adjust the overall color grading to a warmer, more vibrant tone, while maintaining natural skin tones on the girl. Increase the creamy bokeh effect in the background, making it appear softer and more painterly.
Prompt 3
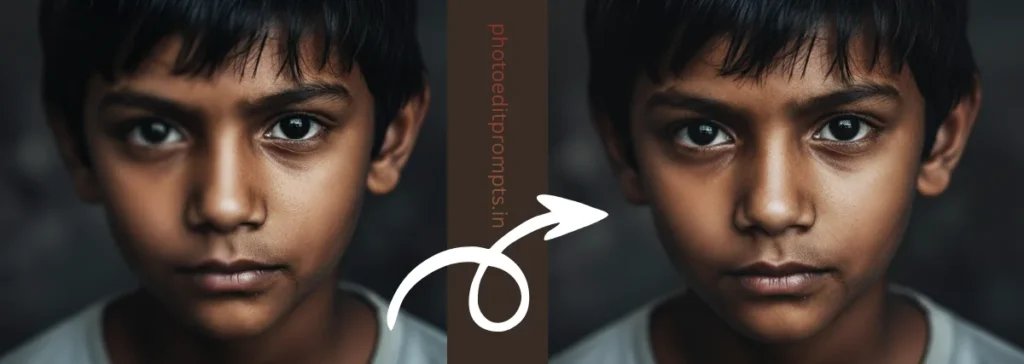
Convert this blurry image into an ultra-detailed, hyper-realistic 8K cinematic photograph with enhanced clarity, sharpness, brightness, contrast, and overall image quality. Restore fine textures, lighting, and depth to achieve a professional DSLR-level cinematic finish with a natural glossy matte balance. Maintain the original facial features, expressions, proportions, background, and composition exactly as in the source image — only enhance realism, definition, and visual depth for a lifelike, high-end result.remove the blur effects and extra exposure shadow
Conclusion
This blog reveals the best easy copy and paste Fix Blurry Background in Google Gemini Image Generation
Prompts and all results are outstanding masterpieces.
This is true that clarity is knowing that blurry backgrounds aren’t random — they’re prompt-driven.
All these promprts are get the credibility because every prompts are testing, comparing, and sharing real examples.
The good thing is the consistency is key in original and generated image. And finally, all the readers and
prompt users get the trust enough on these given prompts.
Remember, the secret to stunning Gemini backgrounds isn’t AI magic — it’s your clarity, creativity, and control.
Write your valuable comment on Blurry Background in Google Gemini Image Generation Prompt.
FAQs
Do Gemini prompt is expert in image generation?
Yes, gemini prompt for image generation is a easy job.
Give me the best website for Google Gemini prompt?
You can get different types of multiple prompts in website – https://photoeditprompts.in/


Your article helped me a lot, is there any more related content? Thanks! https://www.binance.bh/futures/ref?code=L4EUT9FG